Get through the dreary winter with a few DIY projects – and give your furniture a new look!
The long winter is the perfect time for DIY projects: painting, making collages, crocheting, knitting - or even pimping up furniture!
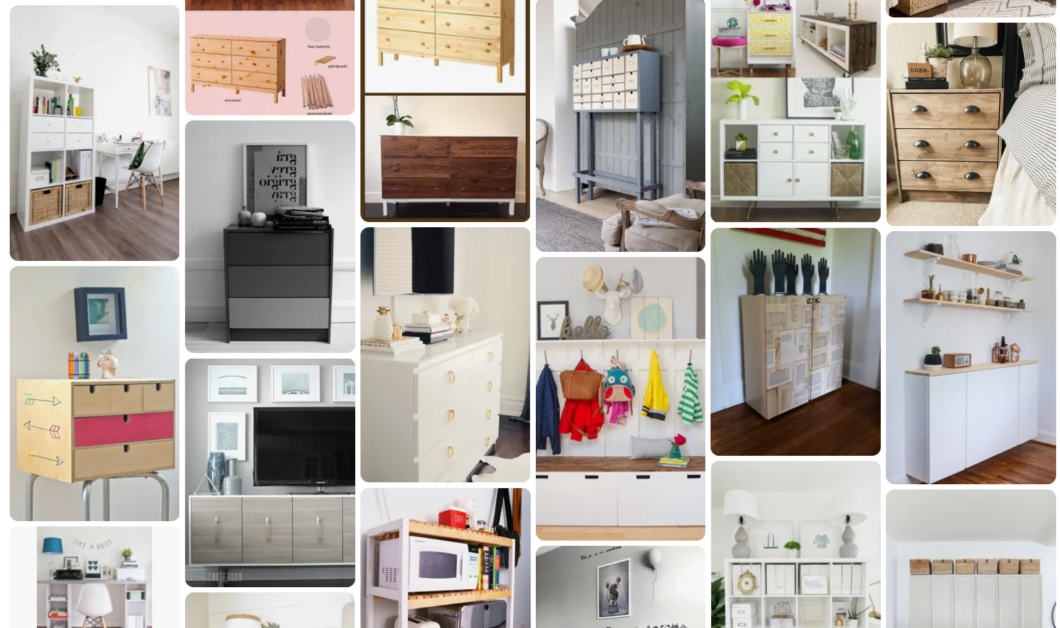
For example, one of the many pieces of furniture from the Swedish furniture giant, of which almost everyone probably has a few at home.
With a few simple steps and a few inexpensive tools, you can quickly give many of these objects an individual look.
We have been inspired by bloggers, interior professionals and hobby designers and have compiled the best ideas.
Give wall shelves an individual look
The classic shelves from the "Lack" series blend harmoniously into almost any interior - sometimes you almost forget that they are even there.
With the DIY tip from the French lifestyle blogger Sabine, you can transform the understated all-rounder into a real eye-catcher for little money.
Using paint markers, she covered the white shelves with a checkered pattern, which she fixed with matt varnish spray.
The result: an attractive tile look. "It's wonderfully simple, and all in all, it didn't cost much more than 40 dollars!" she explains.
"I'm always looking for such simple and inexpensive solutions - that way you can let off steam without any inhibitions.
In this case, I was looking for a shelf for my plants. Since it is subjected to quite a lot of wear and tear, I didn't want an expensive designer shelf."
The white "tiles" form a nice contrast against the blue wall. But you can let your imagination run wild when it comes to shape and color.
Convert a stool into a bedside table
Are you looking for an original bedside table for little money? With a net of imitation leather straps, the simple "Frosta" stool can be transformed into an individual bedside table in no time. The particularly ambitious hobby craftsmen among you can even paint the legs.
Replacing handles
In this child's room, - the classic storage system - has been given a personalized upgrade with cute handles in the shape of animal heads.
And when the child grows up and wants a more "grown-up" interior, the handles can be easily replaced at any time.
Of course, this DIY tip doesn't just work in the child's room. You can pimp up practically any piece of furniture with stylish handles.
Replacing feet
In blogger Ilaria Fatone's living room, the "Bestå" unit has taken on a new level of sophistication.
Ilaria enhanced this simple piece by adding six untreated wooden legs from Prettypegs, giving it an elegant, airy vibe that matches beautifully with the wood-framed interior window behind it.
This mix of open and closed sections transforms the standard furniture into a stylish, unique sideboard.
Convert fruit bowls into pendant lights...
This creative DIY project comes from blogger Flore of Meudon, near Paris.
Instead of splurging on an expensive designer pendant light, she cleverly repurposed elegant fruit bowls to create a unique and budget-friendly lighting solution.
Flore simply purchased cables and lamp holders, drilled the necessary holes in the bowls, and assembled them.
She painted the bowls black on the outside for a sleek, modern appearance, and the gold-plated interior adds a warm glow to her kitchen counter, enhancing the ambiance with soft, inviting light.
Transform baskets into ceiling lights
Thomas, an upcycling enthusiast from Nice who shares an apartment with his son Theo, has creatively transformed simple laundry baskets into ceiling lights for their living room.
This cost-effective yet stylish interior design choice not only saves money but also places Thomas squarely within a current trend.
His DIY project mimics the popular wicker hanging lamps, celebrated for their warm and relaxed aesthetic, proving that great style doesn't have to come at a high price.
Make a natural attachment for the night light
Clamp lamps are known for their practicality and versatility. They can be easily adjusted to meet individual lighting needs and preferences in terms of alignment and light intensity.
Nanette, showcasing innovative use of these lamps, has taken customization a step further by integrating elements from nature into her home decor.
In her bedroom, she attached the "Ranarp" clamp spot to a beautifully unique branch she found in the forest, using it as a bedside lamp.
The natural wood provides a striking contrast against the gray wall, adding authenticity and a poetic touch to the room's ambiance.
Build a serving trolley from wooden boxes
Summer is just around the corner, and so is balcony season. Serving trolleys are incredibly handy for shuttling food and utensils between the kitchen, dining area, and terrace.
These versatile carts are also perfect for storing fruits and vegetables. If the commercial options don't catch your eye, why not build one yourself?
With just a few supplies like three wooden crates , some wooden strips, wheels, a bit of paint, and a dash of DIY spirit, you can create your own customized trolley.
Not only is this a fun project, but it also offers a great way to save money.
Put a piece in the spotlight with a fresh coat of paint...
To enhance the loft aesthetic of her apartment, Audrey decided to give her Ikea sideboard a makeover by spraying parts of it black.
The black accents modernize the furniture and accentuate the natural color of the wood, creating a contemporary and graphic look that adds structure and style to the room.
... or let it disappear completely discreetly
Cristina and Jordi from Spain took a creative approach to their chest of drawers by painting it the same color as the wall behind it, allowing the furniture to almost blend into the background.
To enhance this seamless look, they removed the traditional handles and opted for drilled holes in the drawer fronts, further emphasizing the unit's sleek, clean appearance.
A bedside table with ambition
The "Rast" bedside table has found a new life beyond the bedroom as a versatile side table.
Repurposed for use in the living room, entryway, or study, this piece is transformed when turned on its side and customized with a back panel made of cord and a clamp light.
This setup makes it not only practical and stylish but also an affordable solution for various spaces. What more could you want from such a flexible furnishing?
Mirrors 1 + 1 = 3
Mirrors are a well-known trick for making rooms look larger and brighter.
If you're tight on space and don't have a wall large enough for an XXL mirror but dream of having a dressing area, here's a clever design tip:
In one apartment, two ordinary wardrobes were positioned back to back—one for each partner—and a custom-sized mirror was installed on the side.
This setup effectively uses limited space while adding functionality and a sense of openness.
Author
-
Elizabeth Demolat is a Foodie, travel and lifestyle writer. Elizabeth loves exploring new destinations. Right now, Elizabeth is focused on finding cool local spots and taking trips through the southeastern Canada.