Is your favorite cup broken? Repair the broken pieces with Kintsugi! A guide to the Japanese repair technique
Kintsugi - a centuries-old tradition
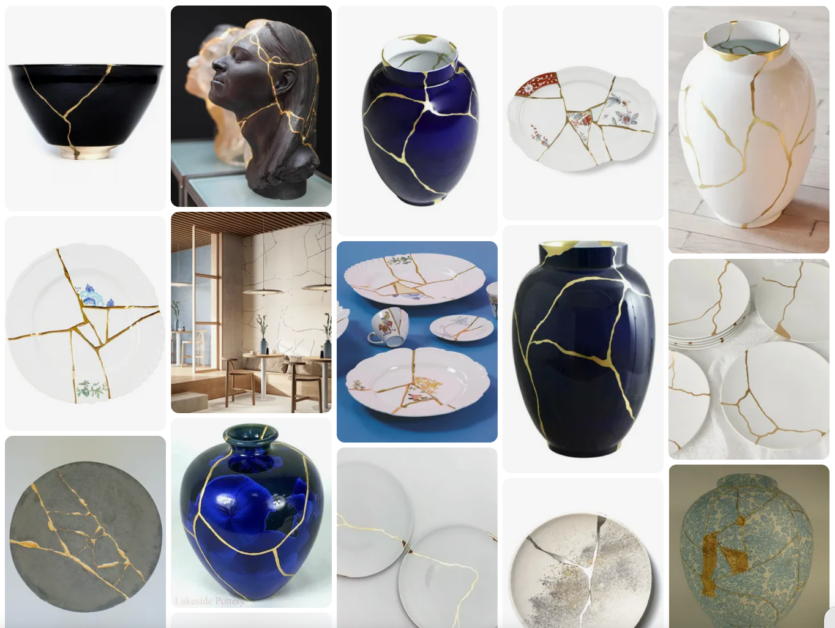
Kintsugi (literally "repairing with gold") is a traditional Japanese technique.
Broken ceramic cups and plates are put back together using a special lacquer and then refined with gold or silver.
In Japan, the tradition of lacquer repair dates back to the Jōmon period, which ended around 300 BC. In the Muromachi era (14th and 15th centuries), this custom became a true art form that emerged at the same time as the tea ceremony was introduced.
The repair marks along the fracture lines are called keshiki ("landscape").
By emphasizing these newly emerging forms, Kintsugi gives the object an independent value and a new elegance. This traditional method does not just connect fragments together.
Kintsugi art also includes the creation of new keshikis and restores the lost harmony. We visited Kintsugi artist Miho Fujita at one of her workshops and give you instructions on the Japanese art of tableware repair.

This is what a repaired cup looks like, the broken handle of which was reattached to the vessel by Miho Fujita using the Kintsugi technique and refined with gold lacquer.

Kintsuki lacquers In traditional Kintsugi
hon-urushi
("real lacquer") is used . But we will be working with shin-urushi ("new lacquer").
What is the difference between these two lacquers? Hon-urushi is the resin of the lacquer tree ( Toxicodendron vernicifluum ).
It has an elegant shimmering color and is resistant to acidic and alkaline elements. However, as long as it is still wet, it can trigger severe allergic reactions.
Therefore, special care must be taken when processing it.

A practical alternative is the synthetic version shin-urushi . It looks exactly like its natural counterpart but is much easier to handle.
However, the dishes that are repaired with it may only be used for decorative purposes and may not come into contact with food.
Although both lacquers are very durable, the following applies to both hon-urushi and shin-urushi : bowls or plates that are put together with them using the Kintsugi technique should not be put in the oven, microwave or dishwasher.
Abrasive cleaners must also not be used.
Important: You can buy Kintsugi repair kits at craft stores or order them online.
Read the instructions for use of the lacquer you are working with carefully.
Follow all precautions and do not skip any of the steps stated in the instructions for the respective product.

Materials required for Kintsugi:
- Ceramic adhesives
- Two-component epoxy resin-based repair putty (curing time is about 5 minutes and varies depending on the brand; spraying alcohol on the surface can extend the processing time)
- Waterproof sandpaper (400-1000 grit for the first pass and 1500 grit or higher for finishing)
- Shin-urushi -Lack
- Color powder or pigments (here: a brass-like color)
- Special Shin-urushi cleaning agent
- Tire war - Verdünner
- Pipette
- Fine brush (model building brushes are best)
- Water
- Aluminium foil

Repairing according to Kintsugi – this is how it works:
1. Examine the object.
Clean the object thoroughly and check the condition of the broken parts. Look for cracks that only appear on one side of the ceramic (in Kintsugi there is a term for such cracks: nyu ).

2. Glue the pieces together.

3. Fill the gaps.


4. Touch up the nyu .
In Kintsugi, nyu refers to tiny cracks in the surface. Sometimes it is difficult to see them at all - so hold the object up to the light.
Apply a little shin-urushi to the cracks with the brush until the varnish has soaked in. Let the object dry for 15 minutes. Once dry, soak a paper towel in shin-urushi cleaner and remove excess varnish from the surface.

5. Sand the putty areas.
First, make sure the putty is actually dry. To tell, you can lightly press a fingernail into one of the putty areas. If it leaves no mark, the putty is dry.
Another method is to gently tap the ceramic vessel with a knuckle. If the putty areas sound the same as the rest of the object, you can be sure the putty is dry.
Dampen a piece of sandpaper and gently sand the putty areas. Choose a sandpaper that is appropriate for the material.
Softer material requires finer sandpaper (the higher the grit number, the finer it is). Stoneware or unglazed porcelain is usually softer than glazed porcelain. For the vessel seen here, 400 grit sandpaper was used.


6. Apply the "landscape" ( keshiki ).


Kintsugi is not just a repair technique, but creates its own aesthetic that was not present in the original object. Nowadays, interior professionals use the typical Kintsugi aesthetic for interior design, as in the example of Peruri Design Company .
Fujita (pictured) sums up what makes Kintsugi so appealing: "You give an object your personal touch.
This connects you with the object and it becomes something very special to you. Don't just throw away plates and cups that you have used every day. Instead, enrich the objects with their own story."

Kintsugi was developed for Japanese tableware, but can also be used with our western tableware without any problems. The artisan once again points out that caution should be taken when handling the lacquer. "But apart from that: just enjoy it!"
The Kintsugi workshop took place in the Tokyo gallery Suginami Uminoie , which belongs to the product designer Shunsuke Umiyama.
The rooms are located in a 60-year-old house in the traditional Japanese style, which he renovated himself.
On the upper floor he sells his products and provides rooms for workshops by artists and artisans.
Are you already familiar with the art of Kintsugi and have used it to repair your favorite pieces? Then please share your experiences in the comments.